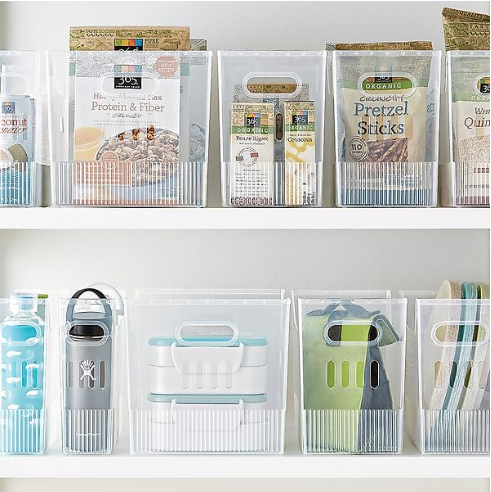
Where is the best place to begin a household organizing project? I often recommend the pantry as an easy starting point. Depending upon the size, most basic pantry organization projects can take just 1 to 3 hours. Keep reading to see my process. (And I reveal my #1 favorite pantry organizing container!) These pantry organizing tips are guaranteed to get you started on the right foot!
When organizing a pantry, start with an “empty, quick-toss and sort.” Take everything out of the pantry and place it on the kitchen table or island. Toss out any expired cans and boxes of food and items your family will never eat. Second, sort into categories such as canned goods, pasta/rice, baking supplies, spices, breakfast foods, and snacks.
Want a Pinterest-worthy look? As you return groups of items to the pantry, containerize as much as possible. Clear containers allow you to easily see how much you have so you can quickly inventory before hitting the grocery store. It also creates a Pinterest-worthy aesthetic. My favorite pantry containers are the Multi-Purpose Bins from The Container Store. Affordable ($4 – $7 each), durable, handled… all the good stuff. And I love that they are tall… no more wasting your vertical space!

Just be sure to label containers so you don’t mix up the flour and powdered sugar! To make a pantry more visually appealing, take single-serve snacks (like granola bars or fruit snacks) and pop them into an open-top bin. This makes it easier to locate and grab a snack and reduces pantry clutter. Cereals can be dispensed into flip-top, easy-to-pour cereal canisters. Clear glass and plastic food storage boxes and canisters are widely available and provide neat and attractive storage for bulk items like lentils, rice, and pasta.
Discover some inexpensive container options. Purchasing new containers to store pantry items looks fabulous, but it can get spendy. Luckily, containerizing need not break the bank! Check out dollar stores for an assortment of plastic containers and baskets, or visit your local thrift store to find affordable used bins. Repurpose old baskets by using them to store non-perishable bulk veggies (like potatoes and onions), snacks (like granola bars and fruit snacks) or beverage items (like coffee pods and tea bags).
Find your secret storage space. Double-decker wire stacking shelves, tiered cabinet risers, and undershelf baskets can double your storage space and make things easier to find. For example, many cooks struggle with how to organize their spices. Spice jars can be stored on a three-tiered storage riser for easy visibility and space saving. Basic glass spice jars can be separated into sweet and savory or alphabetically. Similarly, Lazy Susan turntables will double storage space inside a pantry or cupboard and make access easy with just a quick spin!
Consider how often you use something. If something is used frequently, keep it close and convenient. Where we put our stuff is as important as what we own. If we can’t find it when we need it, or it’s inconvenient to reach, it’s likely we won’t use it! Put the most-used items at eye level.
Consider safety as well. Top shelves should never contain heavy objects (for safety), and you might put items there that you don’t want the kids to easily access (like bags of chips or candy). Keep heavier items on the lower shelves (such as soda and water bottles.) Also consider keeping a container of kid-friendly, healthy snacks at kid-level so they can help themselves.
Don’t forget the backs of pantry doors. Make smart use of the inside of pantry doors with an over-the-door, adjustable organizer. This should corral a specific category of foods, such as setting up a baking station or holding snacks. One quick and inexpensive way to do this is by hanging an overdoor shoe bag on the back of the pantry door, which will neatly hold spice packets, Jello boxes, or kitchen gadgets.
Label all the things. Use a label maker to label your clear containers. It’s not always easy to identify bulk items simply by looking. Baskets will need hanging tags since label maker tape won’t adhere to wicker. Label as much as possible so that it’s easy to find what is needed. When putting away groceries or unloading the dishwasher, labels allow all family members to know the correct homes. To label a drawer, don’t stick labels on the face of a drawer because it destroys the aesthetic appeal. Instead, put the label on the inside lip of the drawer so it is visible only when the drawer is opened. Likewise, inside a cupboard, label the front side of all shelves. Use a label maker to mark jars and canisters.
I encourage you to tackle your pantry this week using these Pantry Organizing Tips. Let me know how it goes!
